Introduction
If you are using Windows 10, you may have noticed that the device name in Device Manager is not always the same as the name of the device. This can be confusing, especially if you have multiple devices connected to your computer. Fortunately, you can easily change the device name in Device Manager in Windows 10. This tutorial will show you how to do this quickly and easily.
How to Change the Name of a Device in Device Manager on Windows 10?
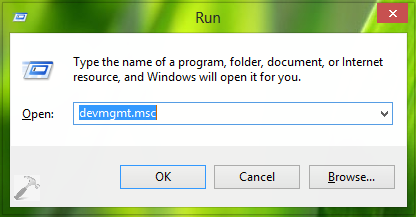
Changing the name of a device in Device Manager on Windows 10 is a simple process. To begin, open the Device Manager by pressing the Windows key + X and selecting Device Manager from the list of options.
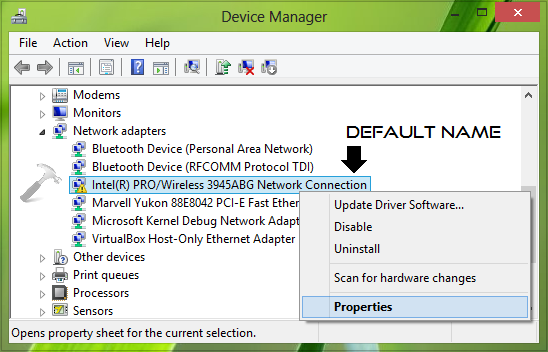
Once the Device Manager window is open, locate the device you wish to rename. Right-click on the device and select Properties from the menu.
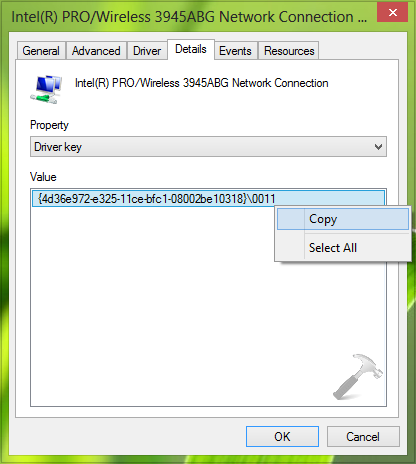
In the Properties window, select the Details tab. From the drop-down menu, select Device Description.
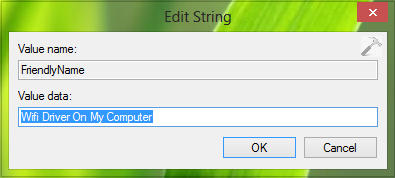
In the Value field, enter the new name for the device. Once you have entered the new name, click OK to save the changes.
The device will now appear with the new name in the Device Manager window. You can now close the Device Manager window. The device will now appear with the new name in any other areas of Windows 10 where it is listed.
Exploring the Benefits of Renaming Devices in Device Manager on Windows 10
Renaming devices in Device Manager on Windows 10 can be a useful tool for organizing and managing your computer’s hardware. This article will explore the benefits of renaming devices in Device Manager and how to do it.
One of the primary benefits of renaming devices in Device Manager is that it can help you keep track of your computer’s hardware. When you first install a device, it is often given a generic name that may not be descriptive enough to help you remember what it is. By renaming the device, you can give it a more meaningful name that will help you identify it more easily.
Another benefit of renaming devices in Device Manager is that it can help you troubleshoot problems with your computer’s hardware. If you have multiple devices installed, it can be difficult to determine which device is causing a problem. By renaming the devices, you can easily identify which device is causing the issue and take the appropriate steps to fix it.
Finally, renaming devices in Device Manager can also help you keep your computer organized. If you have multiple devices installed, it can be difficult to keep track of them all. By giving each device a descriptive name, you can easily find the device you are looking for without having to search through all of your devices.
Renaming devices in Device Manager is a simple process. To begin, open Device Manager by typing “Device Manager” into the Windows search bar. Once Device Manager is open, you can select the device you want to rename and right-click on it. From the menu that appears, select “Rename” and enter the new name for the device. Once you have entered the new name, click “OK” to save the changes.
Renaming devices in Device Manager on Windows 10 can be a useful tool for organizing and managing your computer’s hardware. By giving each device a descriptive name, you can easily identify and troubleshoot problems with your computer’s hardware, as well as keep your computer organized.
Tips and Tricks for Easily Renaming Devices in Device Manager on Windows 10
1. Right-click on the device you want to rename and select “Properties” from the drop-down menu.
2. In the Properties window, select the “Details” tab.
3. Under the “Property” drop-down menu, select “Device Description”.
4. Enter the new name for the device in the “Value” field.
5. Click “OK” to save the changes.
6. The device will now appear with the new name in Device Manager.
7. To rename multiple devices at once, select them all and right-click on one of them.
8. Select “Rename” from the drop-down menu and enter the new name for all the selected devices.
9. Click “OK” to save the changes.
10. All the selected devices will now appear with the new name in Device Manager.
Understanding the Impact of Renaming Devices in Device Manager on Windows 10
Renaming devices in Device Manager on Windows 10 can have a significant impact on the performance of your computer. It is important to understand the implications of renaming devices in Device Manager before making any changes.
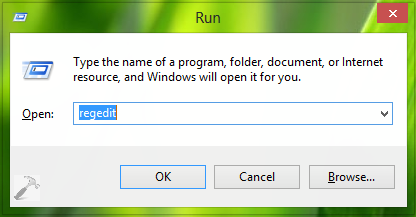
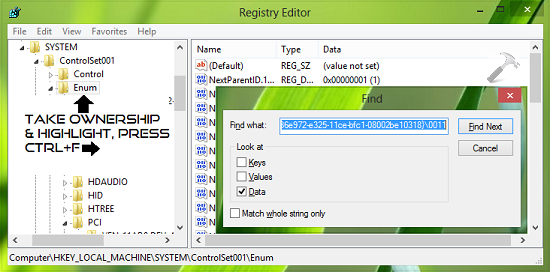
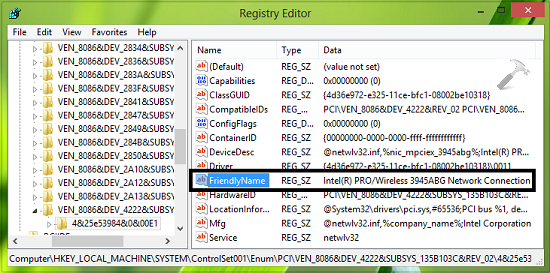
When you rename a device in Device Manager, the name is stored in the Windows registry. This name is used by Windows to identify the device and is used by applications to access the device. If the name of the device is changed, Windows and applications may not be able to recognize the device. This can lead to errors and instability when using the device.
In addition, renaming a device in Device Manager can cause conflicts with other devices. If two devices have the same name, Windows may not be able to distinguish between them. This can lead to errors and instability when using the device.
Finally, renaming a device in Device Manager can cause problems with drivers. If the name of the device is changed, the driver may not be able to recognize the device. This can lead to errors and instability when using the device.
For these reasons, it is important to understand the implications of renaming devices in Device Manager before making any changes. If you are unsure of the consequences of renaming a device, it is best to leave the name as it is.
Troubleshooting Common Issues When Renaming Devices in Device Manager on Windows 10
Renaming devices in Device Manager on Windows 10 can be a useful way to keep track of the various components of your computer. However, it is not uncommon to encounter issues when attempting to rename devices. This article will provide some tips for troubleshooting common issues when renaming devices in Device Manager on Windows 10.
First, make sure that you have the correct permissions to rename the device. If you are not an administrator on the computer, you may not have the necessary permissions to rename the device. To check your permissions, open the Device Manager, right-click on the device you want to rename, and select “Properties”. In the Properties window, select the “Security” tab and make sure that you have the “Change” permission.
Second, make sure that the device is not currently in use. If the device is in use, you will not be able to rename it. To check if the device is in use, open the Device Manager, right-click on the device you want to rename, and select “Properties”. In the Properties window, select the “General” tab and look for the “Device Status” field. If the device is in use, the status will be “This device is working properly”. If the device is not in use, the status will be “This device is not working properly”.
Third, make sure that you are using the correct syntax when renaming the device. The syntax for renaming a device is “DeviceName=NewName”. For example, if you wanted to rename a device called “MyDevice” to “MyNewDevice”, you would enter “MyDevice=MyNewDevice”.
Finally, if you are still having issues renaming the device, try restarting your computer. This can often resolve any issues that may be preventing you from renaming the device.
By following these tips, you should be able to successfully rename devices in Device Manager on Windows 10. If you are still having issues, contact your computer manufacturer or a qualified technician for further assistance.
Best Practices for Renaming Devices in Device Manager on Windows 10
1. Open Device Manager:Open
the Start menu and type “Device Manager” in the search bar. Select the Device Manager option from the list of results.
2. Select the device you want to rename: Expand the list of devices and select the device you want to rename. Right-click on the device and select Properties.
3. Rename the device: In the Properties window, select the Details tab. Under the Property drop-down menu, select Device Description. Enter the new name for the device in the Value field.
4. Confirm the changes: Click OK to save the changes. The device will now appear with the new name in Device Manager.
5. Update the driver: If the device is not working properly, you may need to update the driver. Right-click on the device and select Update Driver. Follow the on-screen instructions to complete the process.
6. Restart the computer: After renaming the device and updating the driver, restart the computer to ensure the changes take effect.
Q&A
- How to Change the Name of a Device in Device Manager on Windows 10?
To change the name of a device in Device Manager, right-click on the device and select Properties. In the Properties window, select the Details tab and then select the Device Description field. Enter the new name for the device and click OK.
2. How do I find Device Manager in Windows 10?
To find Device Manager in Windows 10, open the Start menu and type “Device Manager” into the search box. Select the Device Manager option from the search results.
3. What is the purpose of Device Manager?
Device Manager is a Windows utility that allows users to view and manage the hardware and drivers installed on their computer. It can be used to troubleshoot hardware problems, update drivers, and view information about installed devices.
4. Can I rename a device in Device Manager?
Yes, you can rename a device in Device Manager. Right-click on the device and select Properties. In the Properties window, select the Details tab and then select the Device Description field. Enter the new name for the device and click OK.
5. How do I uninstall a device in Device Manager?
To uninstall a device in Device Manager, right-click on the device and select Uninstall. Follow the on-screen instructions to complete the uninstallation process.
6. How do I update a device driver in Device Manager?
To update a device driver in Device Manager, right-click on the device and select Update Driver. Follow the on-screen instructions to complete the update process.


