Step-by-Step Guide to Changing Camera Settings on Microsoft Teams
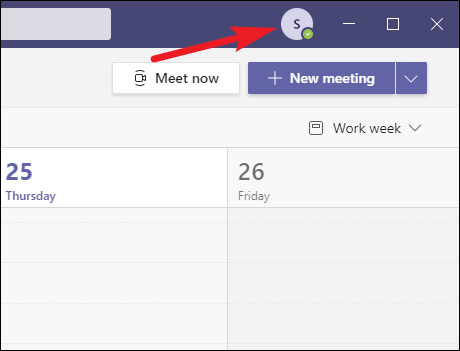
1. Open Microsoft Teams on your device.
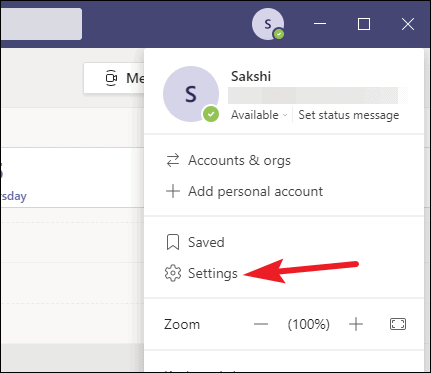
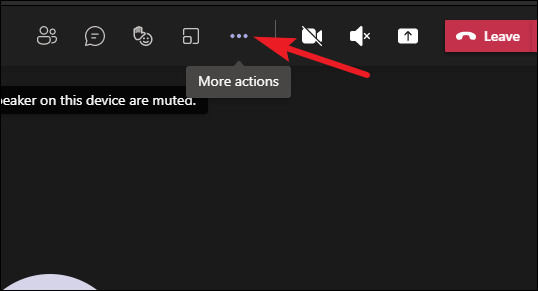
2. Click on the “Settings” icon located at the bottom left corner of the screen.
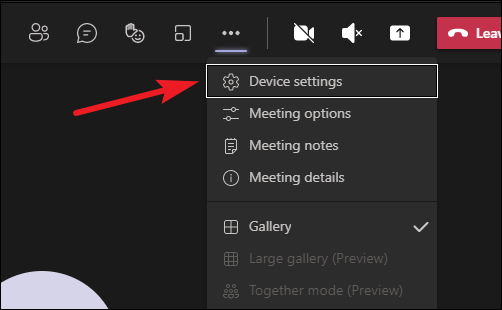
3. Select “Devices” from the list of options.
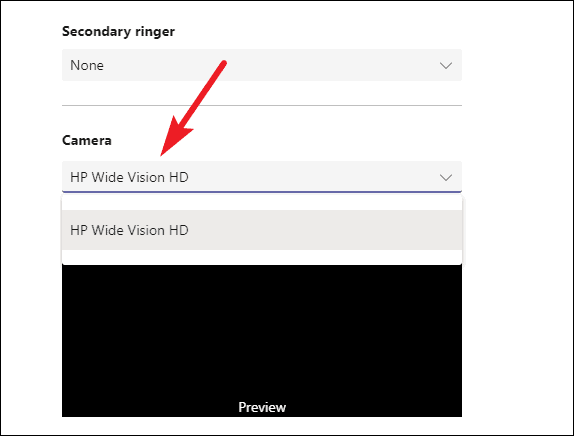
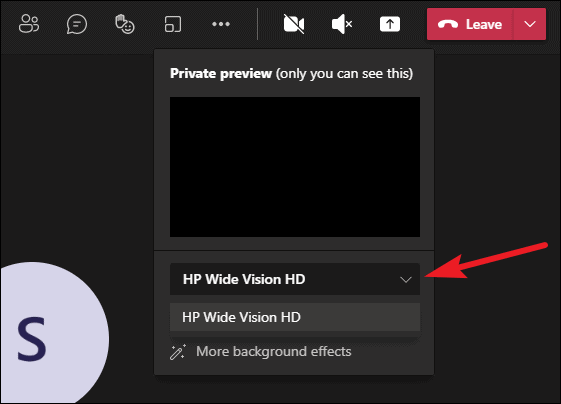
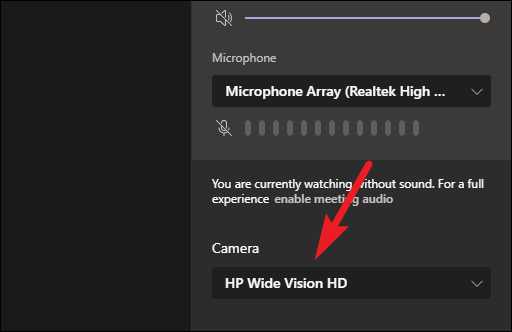
4. Select the camera you wish to adjust from the list of available devices.
5. Adjust the camera settings as desired.
6. Click “Apply” to save the changes.
7. Close the settings window.
Your camera settings have now been successfully changed.
Exploring the Different Camera Settings Available on Microsoft Teams
Microsoft Teams is a powerful communication and collaboration platform that allows users to connect with colleagues, classmates, and friends. It offers a variety of features, including video conferencing, file sharing, and chat. One of the most useful features of Microsoft Teams is the ability to adjust the camera settings. This allows users to customize their video experience and ensure that they look their best during video calls.
The camera settings available on Microsoft Teams are divided into three categories: Video, Audio, and Advanced. The Video settings allow users to adjust the brightness, contrast, and saturation of their video feed. They can also choose to enable or disable the camera’s auto-focus and auto-exposure features. The Audio settings allow users to adjust the microphone volume and select the audio device they want to use. Finally, the Advanced settings allow users to adjust the camera’s frame rate, resolution, and aspect ratio.
In addition to these settings, Microsoft Teams also offers a variety of other features that can help users customize their video experience. For example, users can choose to blur their background or use a virtual background. They can also adjust the camera’s field of view and enable or disable the camera’s low-light mode.
By taking advantage of the camera settings available on Microsoft Teams, users can ensure that their video calls look and sound their best. With the right settings, users can create a professional and engaging video experience for their colleagues, classmates, and friends.


How to Optimize Your Camera Settings for the Best Video Quality on Microsoft Teams
Microsoft Teams is a powerful video conferencing platform that allows users to communicate with colleagues, friends, and family from anywhere in the world. To ensure the best video quality for your Microsoft Teams meetings, it is important to optimize your camera settings. Here are some tips to help you get the most out of your video conferencing experience.
1. Adjust Your Camera Settings: Before joining a meeting, make sure to adjust your camera settings to the highest resolution available. This will ensure that your video is clear and crisp. Additionally, you can adjust the brightness and contrast settings to ensure that your video looks its best.
2. Check Your Lighting: Poor lighting can make your video look grainy and distorted. To avoid this, make sure to check the lighting in the room before joining a meeting. If possible, try to position yourself in front of a window or other light source to ensure that your video looks its best.
3. Use a Headset: Background noise can be distracting and can make it difficult for others to hear you clearly. To avoid this, make sure to use a headset with a microphone when joining a meeting. This will ensure that your audio is clear and that you can be heard clearly.
4. Check Your Internet Connection: A slow or unreliable internet connection can cause your video to be choppy or distorted. To avoid this, make sure to check your internet connection before joining a meeting. If possible, try to connect to a wired connection or use a Wi-Fi extender to ensure that your connection is stable.
By following these tips, you can ensure that your video conferencing experience is as smooth and enjoyable as possible. With the right camera settings and a stable internet connection, you can ensure that your video looks its best and that your audio is clear and audible.
Troubleshooting Common Camera Issues on Microsoft Teams
Microsoft Teams is a powerful collaboration tool that allows users to communicate and collaborate with each other in real-time. It also allows users to share their screens, make video calls, and use their cameras to capture images and videos. However, sometimes users may experience issues with their cameras when using Microsoft Teams.
In this article, we will discuss some of the most common camera issues that users may experience when using Microsoft Teams and how to troubleshoot them.
1. Camera Not Working: If your camera is not working, the first thing you should do is check to make sure that it is properly connected to your computer. If it is, then you should check to make sure that the camera is enabled in the Microsoft Teams settings. If it is not, then you should enable it.
2. Camera Not Showing Up: If your camera is not showing up in the Microsoft Teams settings, then you should check to make sure that the camera is properly connected to your computer. If it is, then you should check to make sure that the camera is enabled in the Microsoft Teams settings. If it is not, then you should enable it.
3. Camera Not Focusing: If your camera is not focusing properly, then you should check to make sure that the camera is properly connected to your computer. If it is, then you should check to make sure that the camera is enabled in the Microsoft Teams settings. If it is not, then you should enable it. You should also check to make sure that the camera is set to the correct resolution and that the focus is set correctly.
4. Camera Not Responding: If your camera is not responding, then you should check to make sure that the camera is properly connected to your computer. If it is, then you should check to make sure that the camera is enabled in the Microsoft Teams settings. If it is not, then you should enable it. You should also check to make sure that the camera is set to the correct resolution and that the focus is set correctly.
These are some of the most common camera issues that users may experience when using Microsoft Teams and how to troubleshoot them. If you are still having issues with your camera, then you should contact Microsoft Support for further assistance.
Q&A
1. How do I change the camera settings on Microsoft Teams?
To change the camera settings on Microsoft Teams, open the app and click on the “Settings” icon in the top right corner. From there, select “Devices” and then select the camera you want to adjust. You can then adjust the camera settings such as brightness, contrast, and zoom.
2. How do I adjust the video quality on Microsoft Teams?
To adjust the video quality on Microsoft Teams, open the app and click on the “Settings” icon in the top right corner. From there, select “Devices” and then select the camera you want to adjust. You can then adjust the video quality settings such as resolution, frame rate, and bitrate.
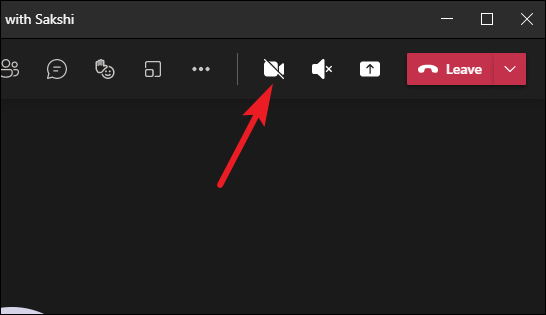
3. How do I turn off the camera on Microsoft Teams?
To turn off the camera on Microsoft Teams, open the app and click on the “Settings” icon in the top right corner. From there, select “Devices” and then select the camera you want to turn off. You can then toggle the “Camera” switch to the “Off” position.
4. How do I adjust the microphone settings on Microsoft Teams?
To adjust the microphone settings on Microsoft Teams, open the app and click on the “Settings” icon in the top right corner. From there, select “Devices” and then select the microphone you want to adjust. You can then adjust the microphone settings such as volume, noise suppression, and echo cancellation.


